When you are preparing an essay or term paper, making a voluminous report, or perhaps writing a whole book, you are faced with the need to create a table of contents. Of course, you can make the content by manually rewriting the titles of all chapters, sub-paragraphs and numbers of the corresponding pages. And you can effectively save your time and create a table of contents using a special function built into the MS Word text editor.

Instructions
Step 1
First, create a new one or select one of the existing unified heading text formatting style. The procedure is as follows:
• Set the desired font, size, text alignment, line spacing and other formatting parameters on one of the headings;
• In the "Style" field located to the left of the "Font" field, manually enter the name of our style, for example, "Style Chapter".
• Apply this style to all chapters that should be included in the table of contents. To do this, select the text with the mouse and select our Style Chapter in the "Style" field. The formatting of the text of the chapters will change.
Step 2
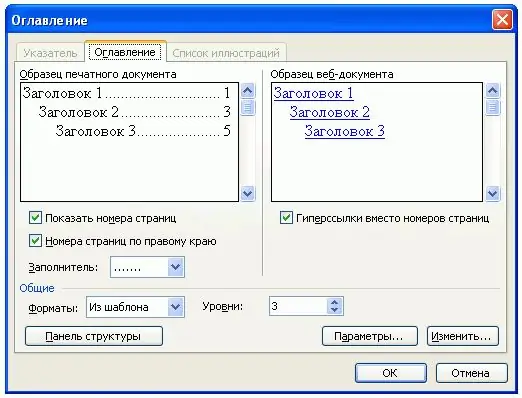
Go to the page of the document, on which you want to create a table of contents, and put the cursor at its beginning. Go to the menu "Insert" - "Link" - "Table of Contents and Indexes …". Go to the "Table of Contents" tab. At the bottom, select "Levels" - 1 and click on the "Options" button.
Step 3
In the window that appears, among the available styles, we are looking for the "Style Chapter" we have created and in the field next to it we put the number 1, which will mean that this style corresponds to the heading of the first level. We erase the same numbers from the fields next to other headings. Click "OK".
Step 4
Returning to the "Table of Contents" tab, you can select the formatting and filler, going from the text to the number indicating the page. We confirm the choice by clicking "OK" again. The content is ready.
Step 5
If you need to create a two- or three-level table of contents, choose a single design style for the subheadings of each level and make the appropriate settings in steps 2 and 3.


